Today I am talking wallpaper and wall panelling. More specifically, giving a soft, some might say boring, gyprock wall a new lease on life.
The wall we are tackling is in the laundry and I have big plans for both how it looks and how it functions. Those plans however, wont work with the wall in its current state. The DIY wall panelling, wallpaper and new paint that I am using will help toughen up the exisiting wall while giving it some much needed character, colour and texture.
The DIY wall panelling lowdown
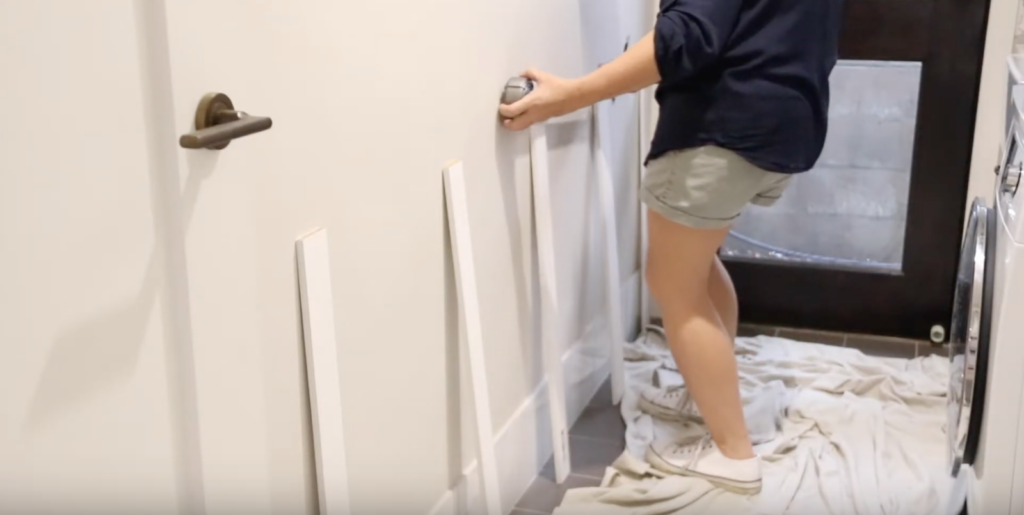
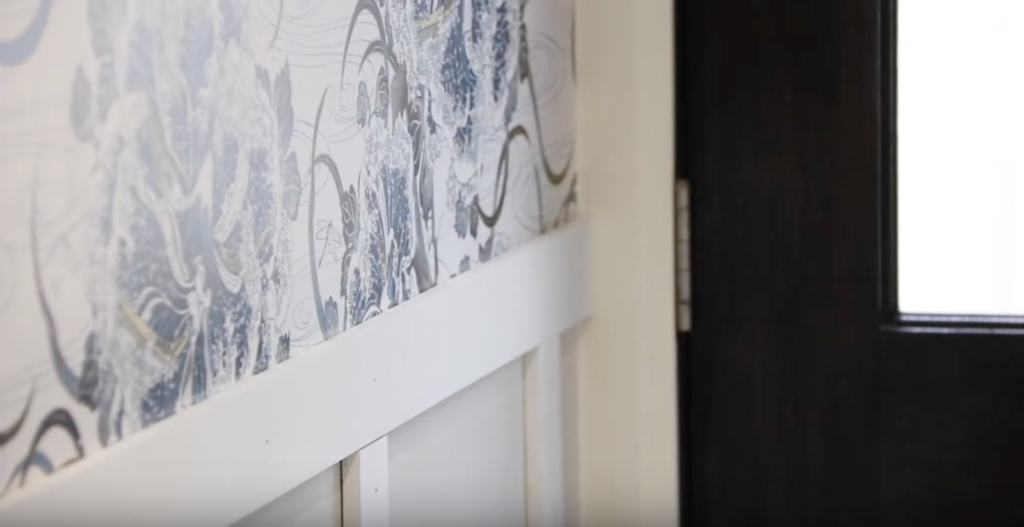
One of the challenges I’m going to have with this battening is size and width. I am keeping the exisiting skirting so I only have a very small lip to play with. To get around this issue, I’ve actually had some really thin timber battens pre-cut at my local hardware and I’m going to install these on top. They’re not going to look like the original sort of paneling that you’d imagine, but they’re a great tweak so I can still get the effect and durability without having to risk re-plastering this whole wall and damaging the floor.
How we installed it
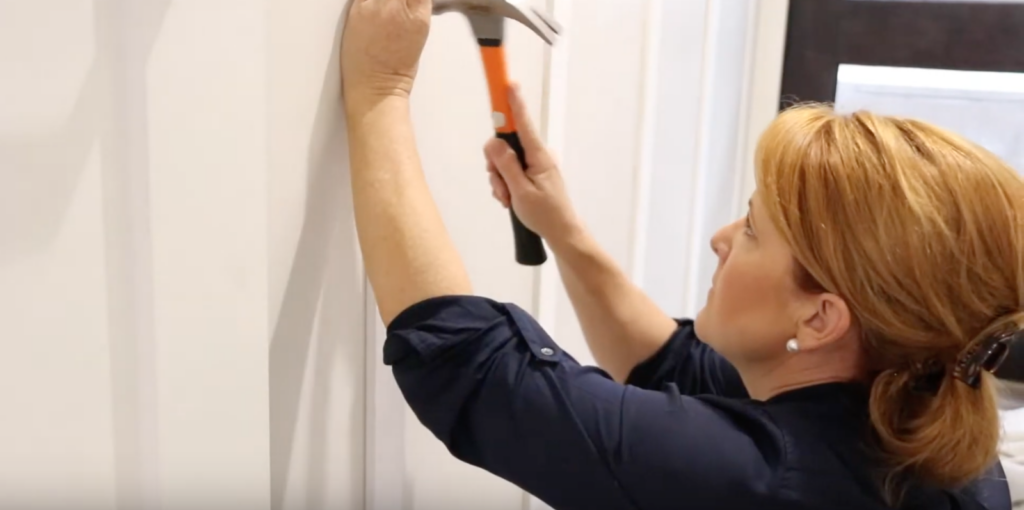
Firstly, I spaced out my battens. This is both for a visual reasons and so that I can measure everything exactly to ensure the battens are an equal distance apart. I’m actually going to be sitting the battens on top of the tile skirt, making sure that they are vertical by using my trusty spirit level, then tacking it all with some really small nails. I’ll then countersink them, putty them, paint them, and we’re ready to go. I am also using one of my all time favorites; Liquid Nails/ No More Nails for some extra security and attachment to the wall.
Other things to think about
The height that I’ve chosen for my battening is actually all about functionality. The top rail is where I want the laundry baskets to hang. I don’t want them too low because then they would hang on the floor and risk getting wet, so I’ve done them high enough that once they’re hung on their hooks, they’ll have good floor clearance.
The wallpaper basics
I’m actually going to leave the top rail off as I’m going to start on the wallpaper. This will allow me to wallpaper down behind the top rail, meaning the finish will be beautiful.
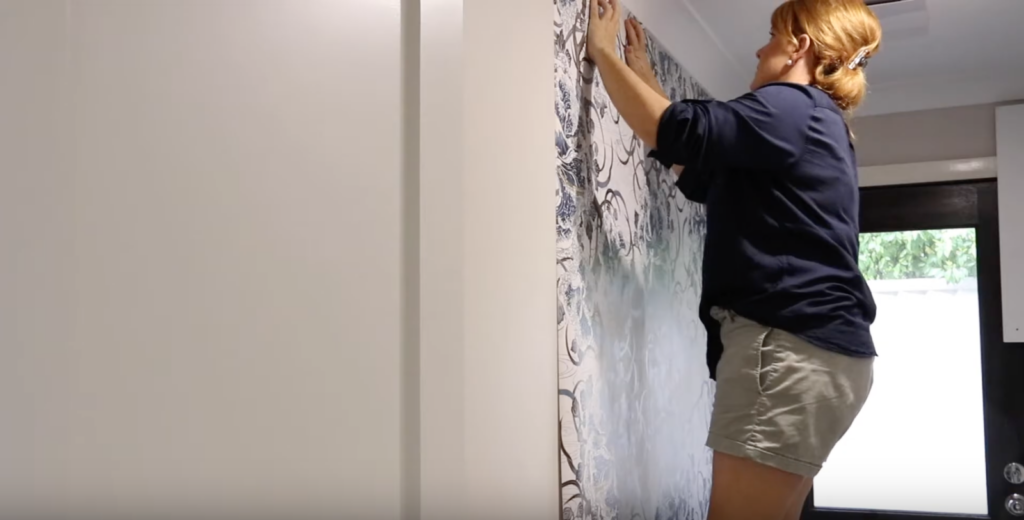
The first step when it comes to wallpaper is making sure that I have the right equipment. This includes a cutting mat, a long metal ruler and a very sharp Stanley knife. There are a range of different ways that wallpapers get stuck to a wall and it’s best to follow the manufacturers instructions. In this case, they have asked that I use a wallpaper glue. I apply it to the back of the wallpaper using a cross hatched pattern and then I fold it onto itself for five minutes to allow it to become tacky. After this time, it is as simple as getting that on the wall, making sure that I am nice and straight because a small error in laying down the first roll can mean a really big error at the other end.
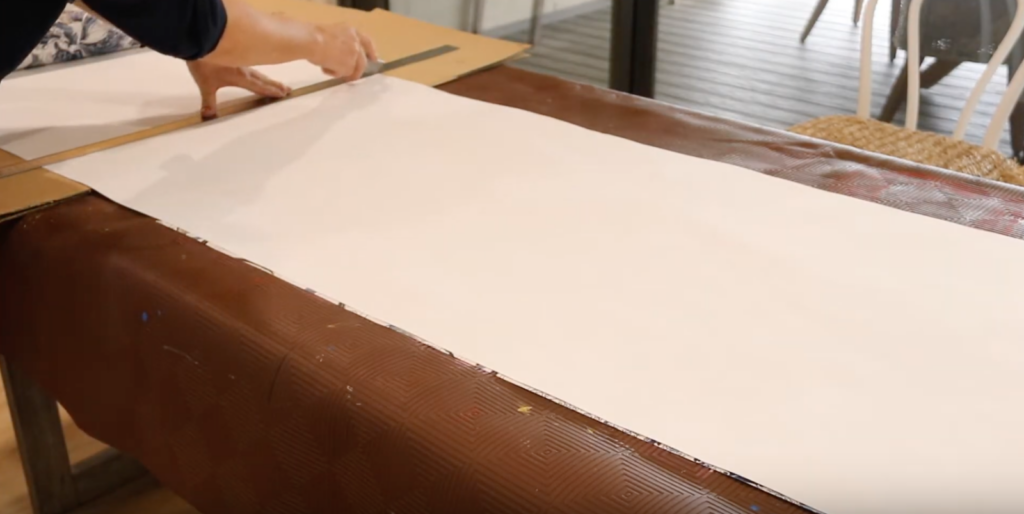
Before I stick anything onto the wall, I need to measure the drop that the wallpaper will be covering. I simply need to measure out the drop, marking it on my wallpaper while making sure that I have a little bit of extra just in case because I am a measure twice, cut once girl! Most wallpapers will come with a repeat distance. This is the distance that the wallpaper pattern actually repeats in. I’ve laid the two first pieces now, part one and part two. I actually need to measure down the repeat distance before I measure my next drop and this will mean that the pattern will be nice and even across the entire wall.
Expert tips and tricks
When I’m applying the wallpaper to the wall, I like to have a baby wipe in my hand. My hands could be really mucky and grimy and that’s the last thing I want all over my beautiful new wallpaper. Having a baby wipe or Wet Wipe means I can clean up as I go, ensuring my wallpaper stays pristine for the duration of the process.
The finishing touches
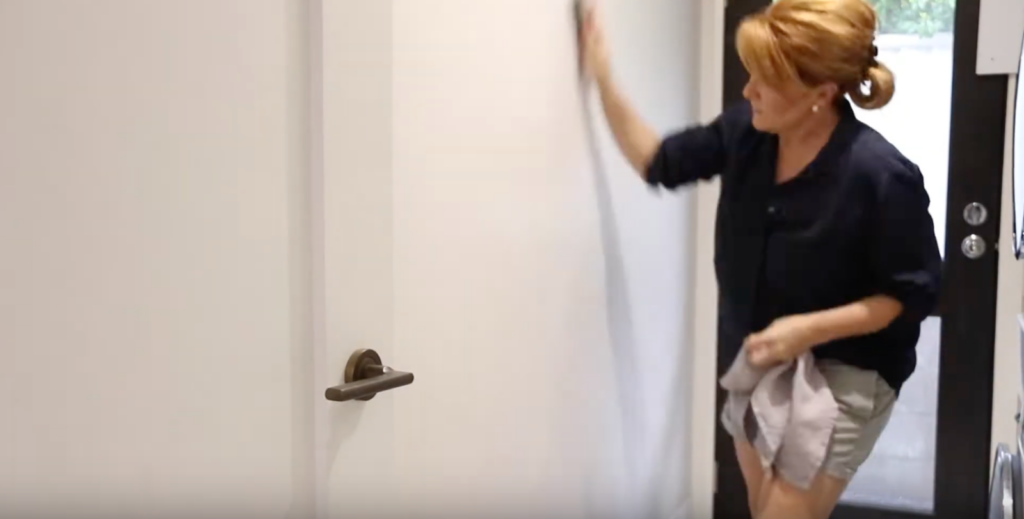
Now that the beautiful wallpaper is in place, I’m going to get really busy finishing off that top batten on the DIY paneling. You’ll see whenever I’m pressing on these battens to make this panelling, I have a rag in hand. As you’re pushing and making sure that you’ve got great adhesion to the wall, you may find that the Liquid Nails or the Nails No More actually oozes out the side. Use your rag to clean up any ooze before it dries!
I’m absolutely loving how this has come up, but to make it look less DIY and more polished, I now need to make some adjustments. So I’m going to be hole punching down each of these nails with a nail punch, puttying over the top so it’s not kind of spotted with nail heads, and I’m also going to gap any little gaps that might be between the wall and the batten or each of the battens, so it gives us that really seamless finished look.
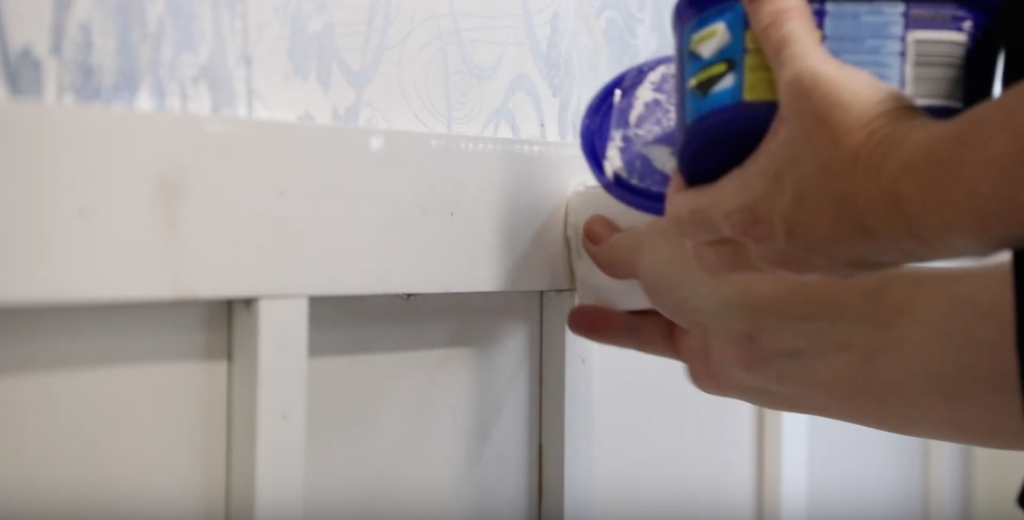
When you’re gapping in a place that you intend to paint over, make sure you use the right gapping product. It’s not your standard silicone that you would use, it’s actually an acrylic silicone that you can paint over with most paints afterwards. Make sure you get the right one!
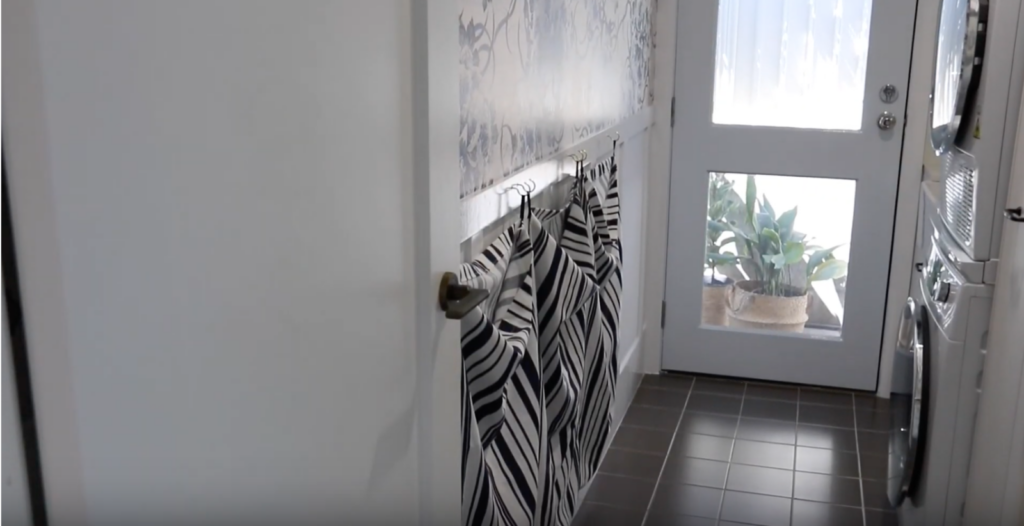
There you have it. Your DIY guide to hanging wallpaper and installing DIY wall panelling, you want to watch this one unfold in real time head over to my Renovie Channel CLICK HERE

For more DIY projects, visit the blog
 Naomi Findlay is an experienced interior designer, project manager and stylist who also loves sharing her passions and experience by teaching others.
Leave a Reply